Dashboards allow users to display relevant information in a structured format. Here’s how you can create one:
Navigate to the Dashboard section in the Residents App.
Tap "New Dashboard", if editing an existing dashboard tap on the options icon and click on “Edit Dashboard”.
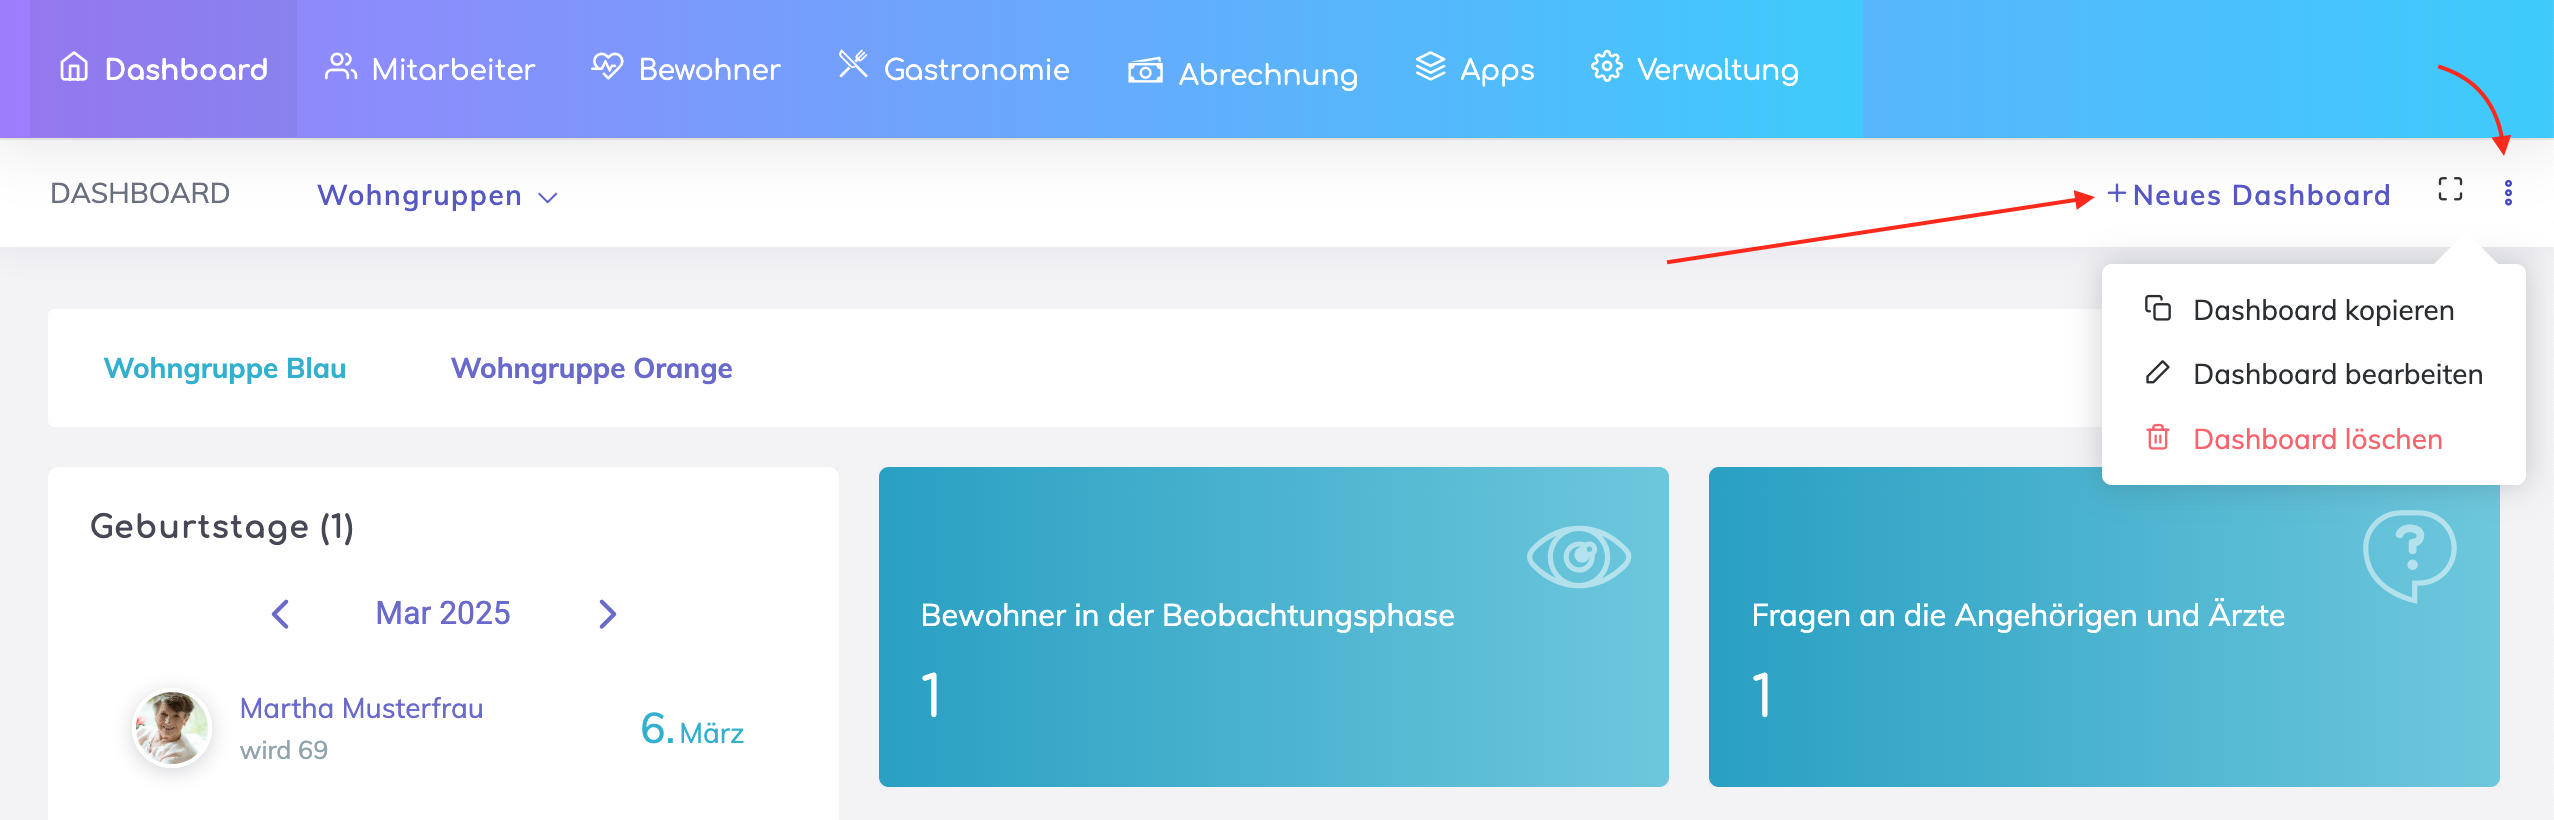
Enter a Dashboard Name and select if the dashboard should be a personal or global dashboard. A personal dashboard is only visible to you but a global dashboard can be shared with selected or all users.
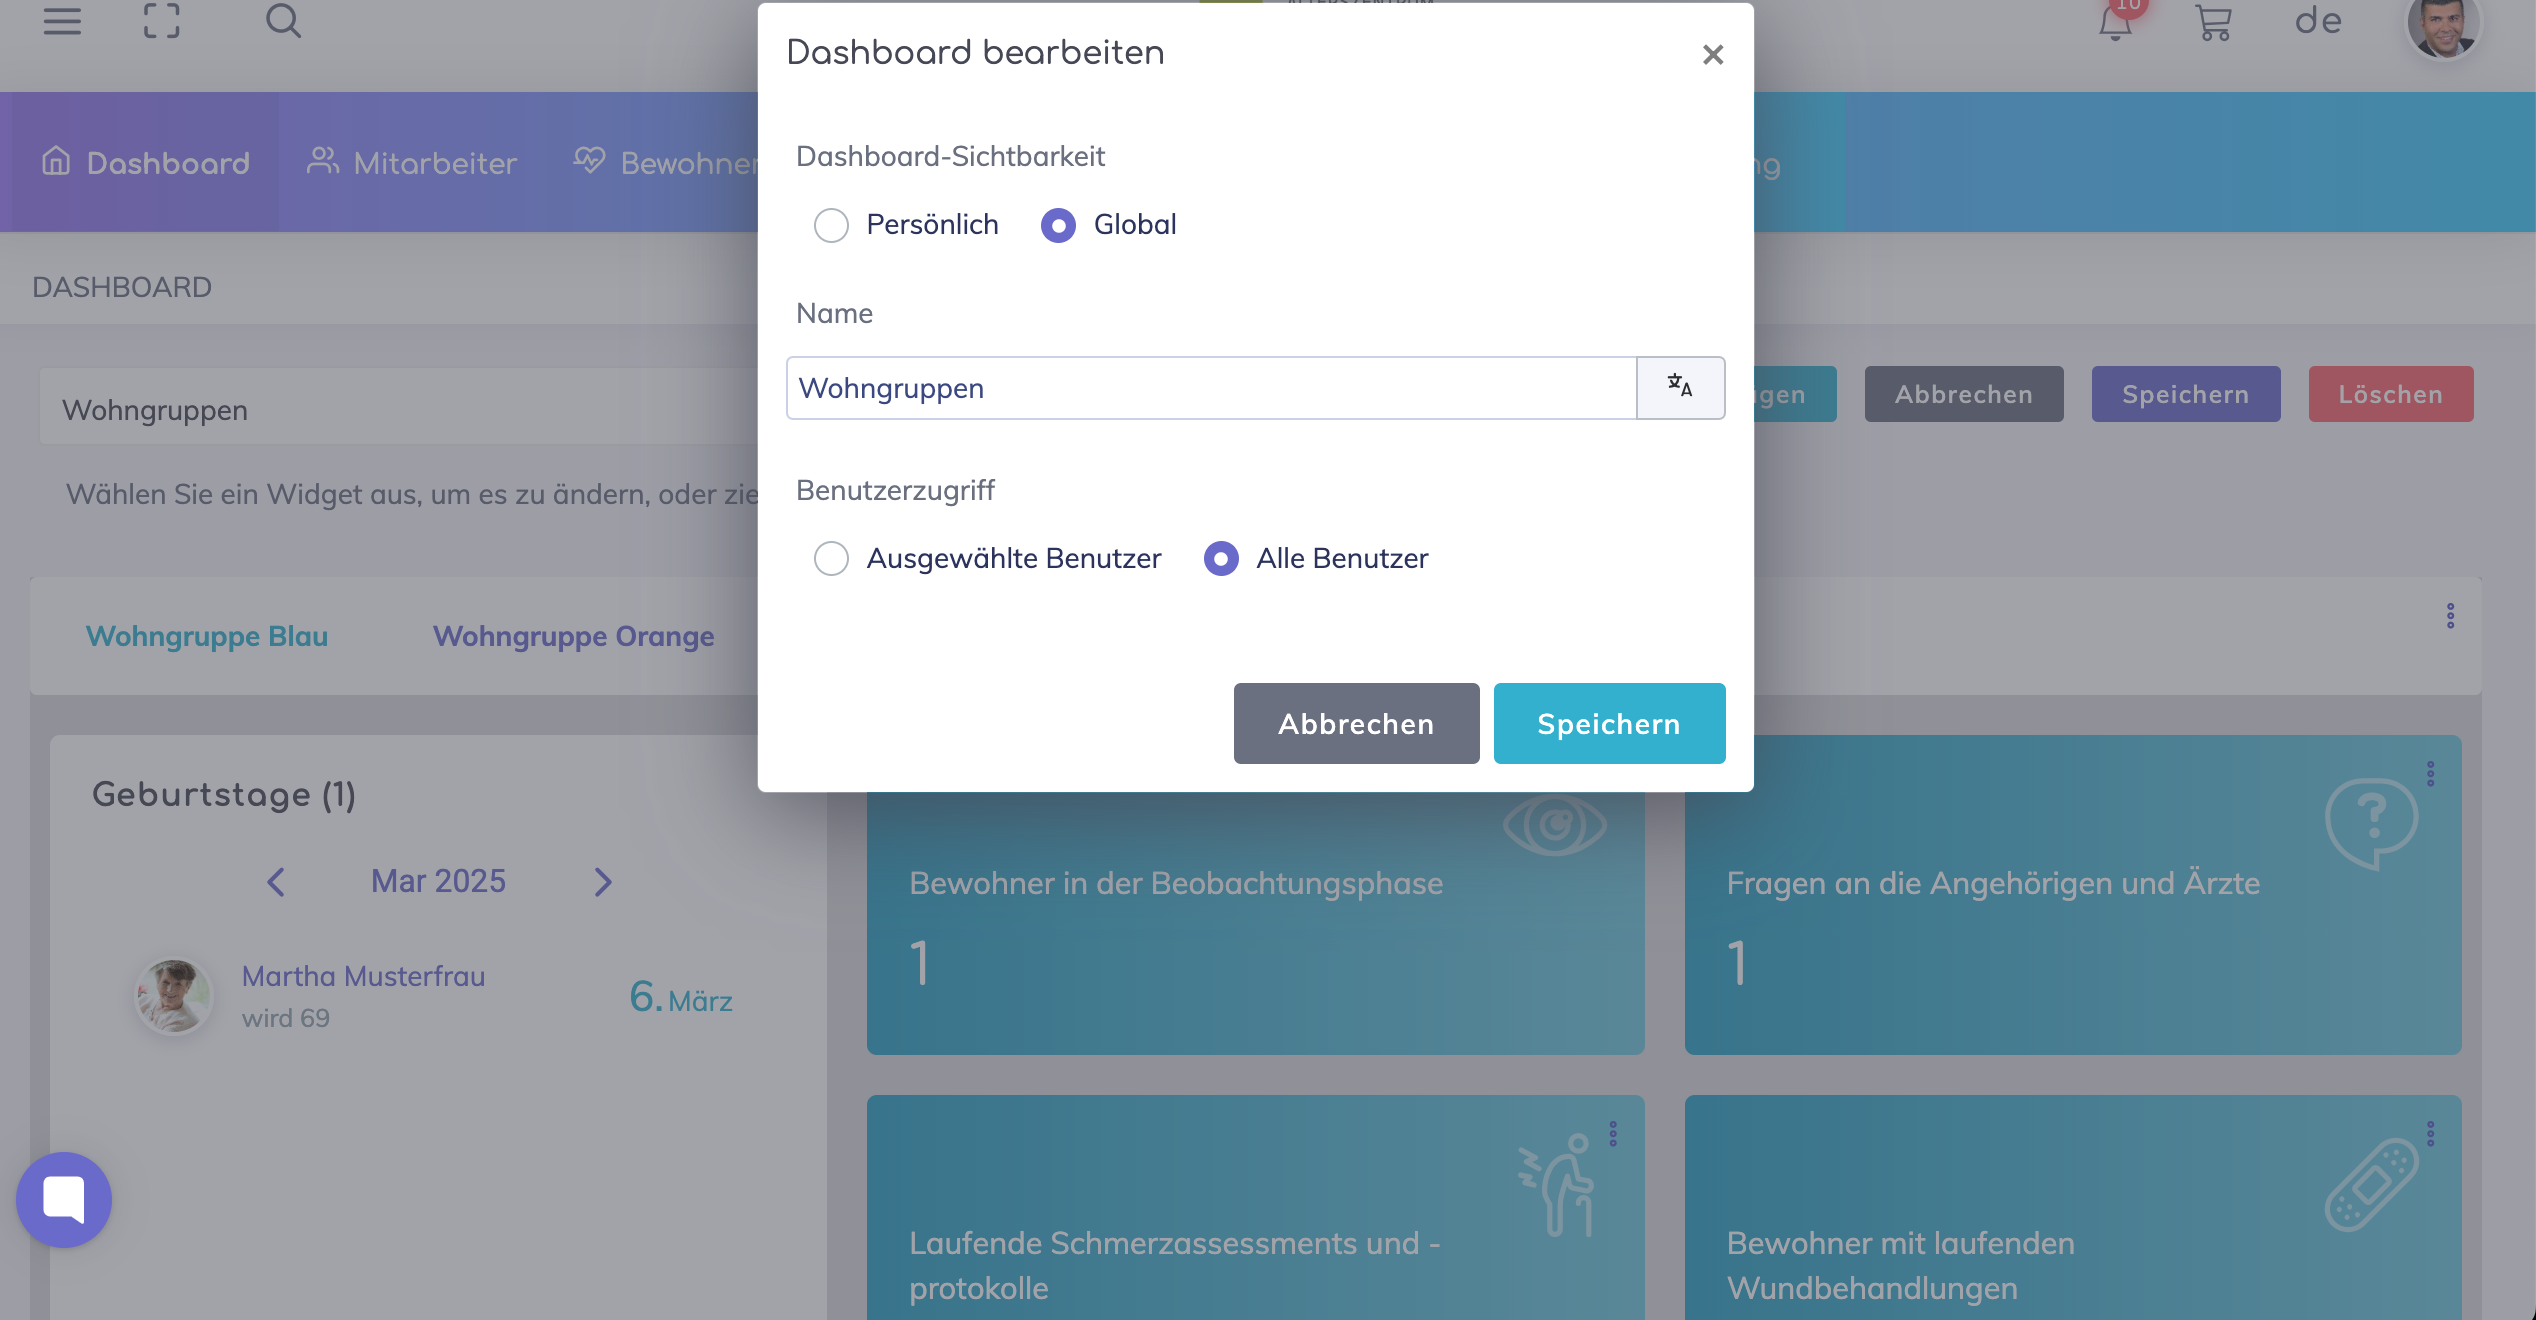


Tap "Save" to create the dashboard.
✅ Once created, you can start adding widgets to personalize your dashboard.
After creating a dashboard, you can add widgets to display relevant data.
Select the Dashboard and tap on the options icon and click on "Edit Dashboard".

Tap "Add Widget".
Choose a Widget Type (e.g., Text, Chart, Table, etc.).
Configure the widget by selecting the data to be visualised and apply filters as required.
Adjust the size and position of the widget on the dashboard.
Tap "Save" to finalize the changes.
✅ Widgets can be resized, rearranged, or reconfigured at any time.
We're here to help. Please feel free to contact us.